Modding a Minecraft server is certainly not the easiest thing I've ever done. (The difficulty level is somewhere between hanging a screen door and changing a diaper for the first time.) With that said, I'm here to make the lives of my fellow parents just a little bit easier.
Why modding?
'Vanilla' Minecraft is certainly fun and full of endless possibilities for gameplay. But modding takes the experience to a level that can be both fun and ease some of the frustration of the game (how many times have you wished you had a map or a quick way to set a waypoint, or just needed a diamond axe, like RIGHT NOW?)
Core concepts
There are a few fundamental concepts that you should understand before you begin.
1) Client vs Server — If you're not familiar with computer lingo, this is important. A 'client' is the computer you use to play Minecraft, whereas a 'server' is the computer that hosts Minecraft. In some cases these may be the same computer, and in other cases the server may be in the cloud.
2) Minecraft game versions — Currently, there are two major versions of Minecraft: the Java Edition, and Bedrock edition. This article refers to the Java edition, which is the version you're likely to use on your PC or Mac.
(Note: the 'Bedrock edition' is also available on PC and is cross-compatible with Xbox and some mobile versions. This is a completely different version and is not compatible with the Java edition. Mods are also uncommon for Bedrock as they are difficult to implement.)
3) Minecraft app versions — Minecraft is updated often, and it's important to know what version you're on mainly because other clients (i.e. your kid's computer or their friend's computers) will usually need to be on the same version to play together. In addition, the server needs to be on the same version as the client.
4) Modding frameworks — Before you can install mods, you'll need to install a modding framework. I recommend Forge because a) it's easy to set up and b) it's widely used.
5) Mod versions — The mod version you install must match the client/server version. It's a pain, but hey, c'est la vie.
6) Client vs server mods — Some mods only run on the client, but in most cases, the mod will require both client and server to be updated. The mod install page should specify.
Setup
1) Set up your server — Unless your kiddo is content to play solo, you'll need a server to run Minecraft on. While you can run a server on any PC, I prefer cloud servers such as ApexHosting, BisectHosting, etc. It can be a little challenging to share your server through your own network, and it could open you up to security issues.
2) Install Forge — Grab the latest version of Forge here. I suggest using the 'recommended' version and downloading the installer. Load it up, and choose the option to install the server (if you're setting up a local server) or client (if you're installing on a PC or Mac client).
Note that if you need to install a specific version of Minecraft for your mod, you'll also need to install that version of Forge as well.
If you're setting up Forge on a cloud server, then you'll have to follow the instructions for your specific server. Typically there will be a setting somewhere in your server hosting panel that allows you to change the server type from 'vanilla' Minecraft to Forge. (If you already have a map set up, back it up first.)
3) Install mods — You can find mods by searching on Google, or via niche sites like Curseforge. Once you've downloaded your mod — and make sure the mod version matches the client/server version — you'll need to install it on both the client and the server.
All mods must live in a folder called mods which is underneath the Minecraft install folder. On a client PC, you can find the mods folder underneath \AppData\Roaming\.minecraft. On a client Mac, you can find it underneath ~/Library/Application Support/minecraft. For your server, the location depends on where you're hosting it. Once you're in the mods folder, just drop the mod in there. (If you don't see a mods folder, just create one.)
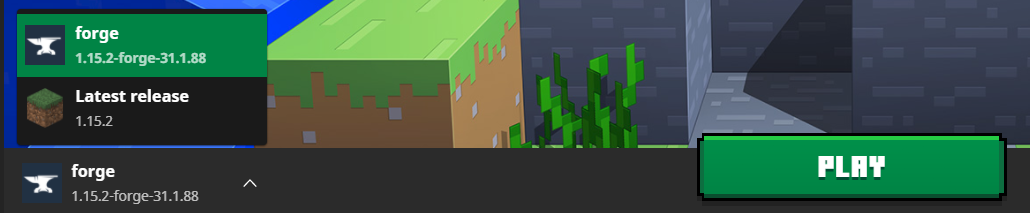
4) Test — Load up Minecraft on one of your computers. To the left of the Play button, you should see a menu with a list of installations. Click it, and you should see the Forge installation. Select that, and click Play.
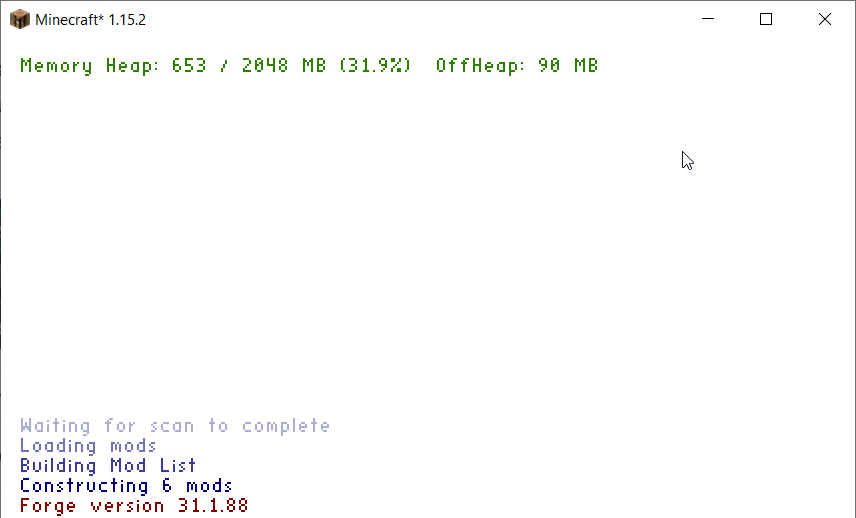
The Forge-ified version of Minecraft should boot up. You'll see a screen like this:
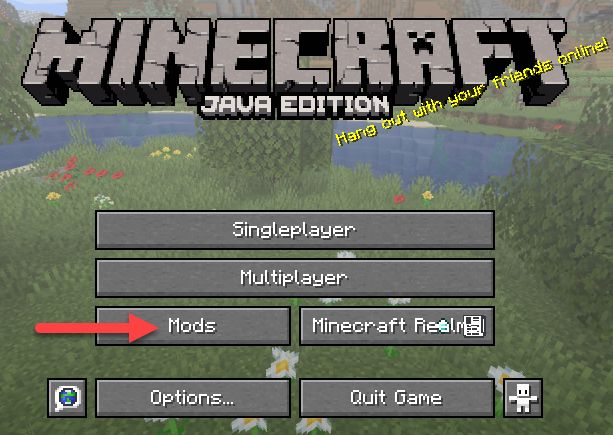
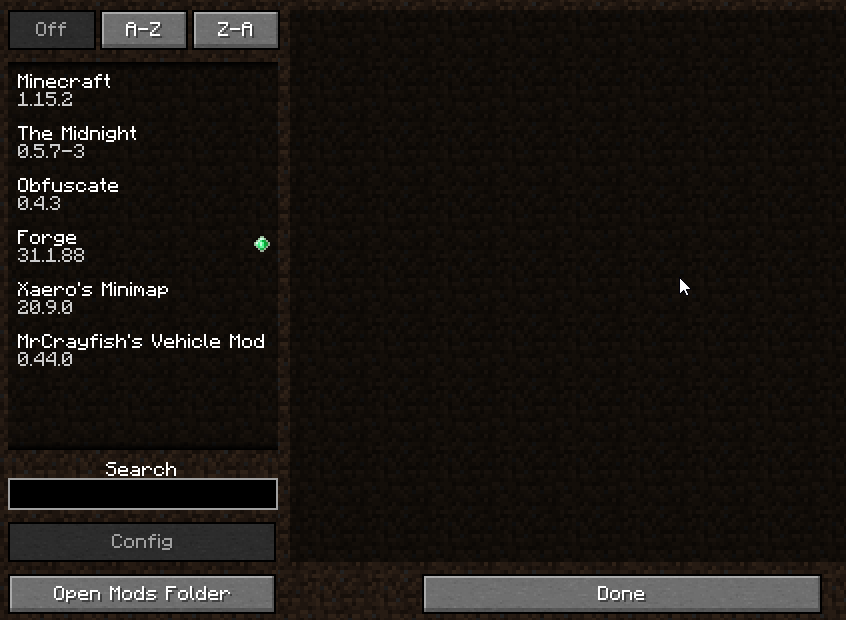
Once Minecraft fully loads up, you should see a button labeled Mods. Hit that button, and if you nailed the install, then you'll see a list of the mods that you installed. If you don't, try again.
To test your server, you'll simply need to play on it. If the mod doesn't work, then most likely you missed a step, or the versions are out of sync between the server and the mod or the client and the server.
5) Play — Have fun!
Advanced tactics: multiple versions of Minecraft
There are two ways to manage multiple versions of Minecraft (and therefore multiple mod versions): the simple but wonky way, and the more complicated but stable way. I'd recommend the latter.
Simple but wonky — Create a subfolder inside of your mods folder with the version number, and then place the mods in there. For example: .minecraft\mods\1.15.2\. The issue with this approach is that some mods won't recognize the folder structure.
More complicated — Create a separate game directory for each version. To do this, launch Minecraft, and then click the Installations tab.
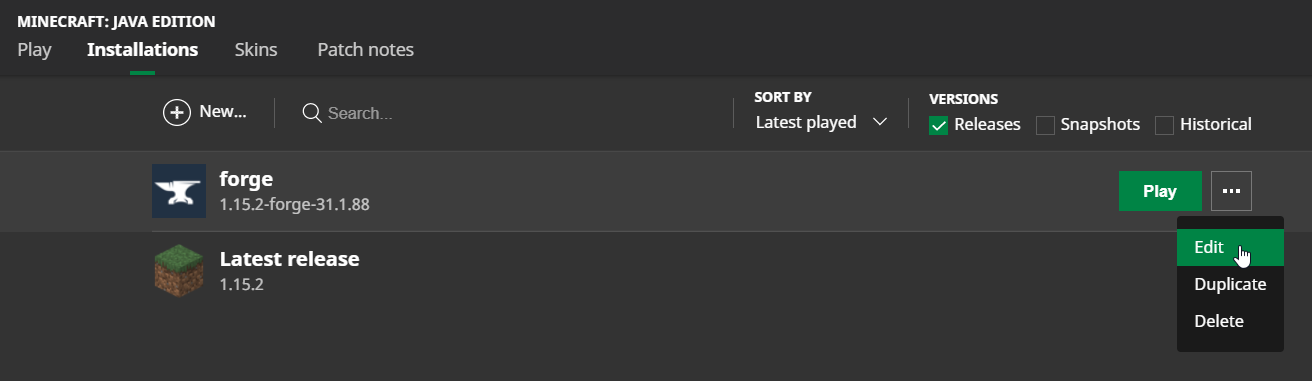
Select the app version, click the … menu to the right of the Play button, and click Edit. Now click the 'browse' button and select the folder where you want to install the app version files. I'd recommend putting it under your main Minecraft folder, and then creating a subfolder called gameversion. Ultimately, the file structure should look something like this:
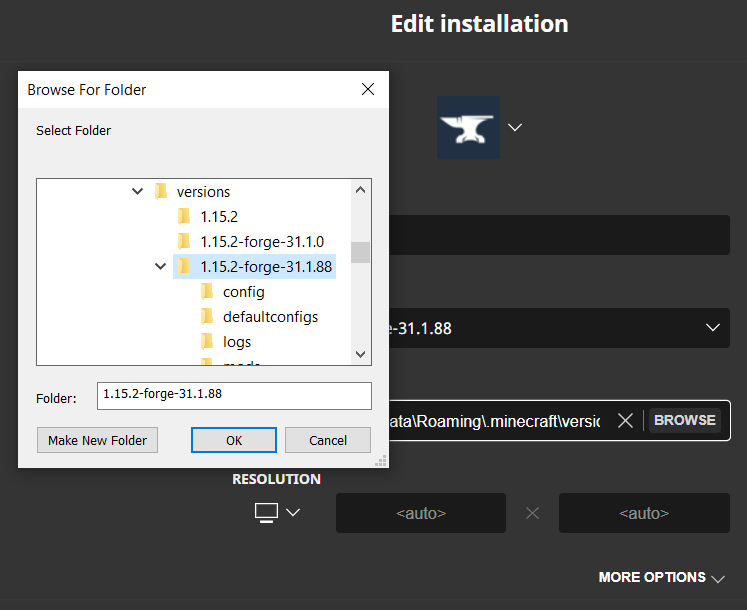
Click Save when you're done. Minecraft will then automatically create all required files when you launch it, so all you have to do is create the folder. Launch Minecraft, and then go back to the folder. The mods folder should be created for you automatically. Add your mods to the folder, and then go to town.
Have questions or run into issues? Let me know — happy to help a fellow parent out.